Setting the address code for LED PAR lights is crucial for ensuring proper control in a DMX lighting setup. This step-by-step guide will walk you through the process, helping you to easily assign unique addresses to each light in your system, and avoid common pitfalls.
Setting the address code for LED PAR lights is essential for controlling each fixture in a DMX system. This guide will help you assign addresses correctly, ensuring each light operates independently.
What Is the LED PAR Light DMX Address?
The address code is the unique identifier for each LED PAR light in a DMX-controlled setup1. Each fixture needs an individual address to operate correctly. The address indicates the starting point for the fixture's DMX channels, which control various functions like brightness, color, and movement.
Key Components of LED PAR Address Setup:
| Element | Explanation |
|---|---|
| Fixture Address | The unique starting address assigned to each fixture. |
| DMX Channels | Channels that control specific fixture functions, such as brightness and color. |
| Address Code | A numeric value that identifies the fixture’s position in the DMX system. |
How Do You Set the DMX Address for LED PAR Lights?
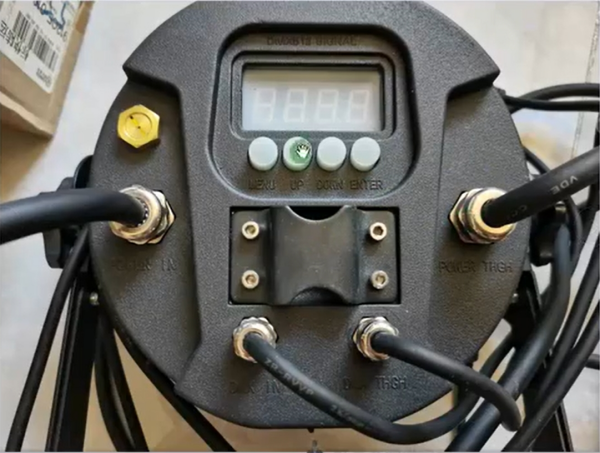
1. Setting DMX Address via Control Panel
If you’re working with a fixture that has a built-in control panel, this is the simplest method to set the address code. It involves using the fixture’s buttons to manually enter the desired address.
Step-by-Step Guide for Setting DMX Address via Control Panel:
| Step | Action | Details |
|---|---|---|
| Step 1 | Power on the Fixture | Turn on your LED PAR light. Ensure it’s in setup mode. |
| Step 2 | Access Address Setting Mode | Use the control panel buttons to navigate to the “Address” menu. |
| Step 3 | Set the Starting Address | Use the buttons to input the desired address. For example, 001 for a 4-channel fixture. |
| Step 4 | Confirm the Address Code | Press the "Set" or "Enter" button to save the address. |
| Step 5 | Exit Setup Mode | Your light will confirm the address code on the display. |
Tips for Control Panel Setup:
- Ensure each fixture has a unique address2 to avoid conflicts.
- For multiple-channel lights, make sure the address accommodates all the required channels (e.g., address 001 for a 4-channel fixture).

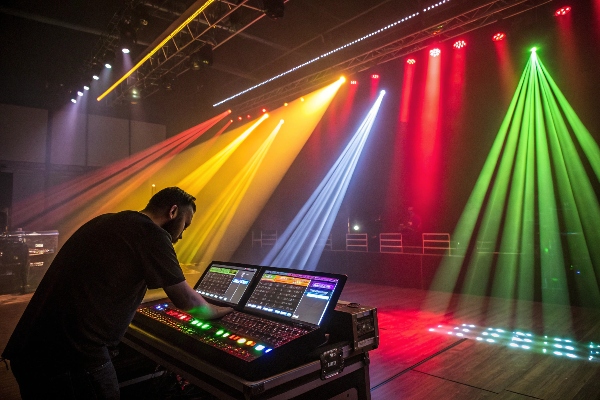
2. Setting DMX Address via DMX Controller
A DMX controller is ideal for managing multiple fixtures. It allows you to quickly assign address codes to several lights at once.
Step-by-Step Guide for Setting DMX Address via DMX Controller:
| Step | Action | Details |
|---|---|---|
| Step 1 | Connect the Fixture to the DMX Controller | Plug the LED PAR light into the DMX controller using a DMX cable. |
| Step 2 | Access Address Settings on the Controller | On the DMX controller, go to the address allocation menu. |
| Step 3 | Select the Fixture’s Starting Address | Use the controller interface to assign the starting address (e.g., 001-004). |
| Step 4 | Confirm the Address Code | The controller will send the address to the fixture, which will display it. |
| Step 5 | Test the Address Setup | Use the controller to test that the fixture is responding to the address. |
Tips for DMX Controller Setup:
- Make sure each fixture has a unique address.
- Use a range of addresses based on the fixture’s channels (e.g., 001-004 for a 4-channel fixture).
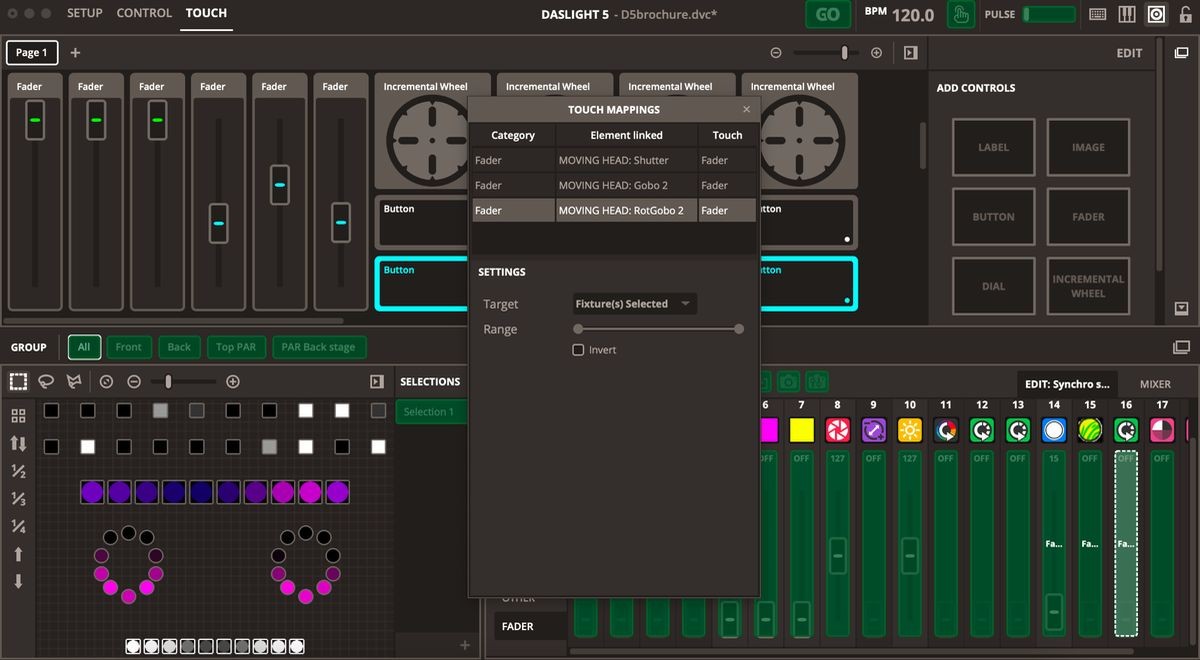
3. Setting DMX Address via Lighting Software
Lighting software is the most efficient option for large setups. It allows you to manage addresses for multiple fixtures simultaneously, streamlining the process.
Step-by-Step Guide for Setting Address Code via Lighting Software3:
| Step | Action | Details |
|---|---|---|
| Step 1 | Connect Fixtures to the Computer via DMX Interface | Use a DMX interface to connect your computer to the fixtures. |
| Step 2 | Open the Lighting Software | Launch the lighting software (e.g., Light Key, GrandMA, or Chamsys). |
| Step 3 | Detect Fixtures | The software will automatically detect all connected fixtures. |
| Step 4 | Assign the Starting Address | Select the fixture and set its starting address from the software interface. |
| Step 5 | Confirm Address and Save Settings | Ensure all addresses are correct and save the settings. |
| Step 6 | Test the Setup | Run a test to confirm each fixture responds independently. |
Tips for Software Setup:
- Ensure the software supports the number of channels your fixtures require.
- Use the software’s fixture management system to avoid address conflicts.
Common Address Code Issues and Solutions
1. Address Code Conflicts
Problem: Two fixtures sharing the same address will respond the same way.
Solution:
- Double-check each fixture’s address to ensure they are unique.
- Use a DMX tester4 to verify address settings.
| Issue | Solution |
|---|---|
| Address Code Conflict | Ensure no two fixtures share the same address. |
| Incorrect Channel Allocation | Adjust the address range based on the fixture’s channel requirements. |
2. Fixture Not Responding to DMX Signals
Problem: A fixture doesn’t respond to DMX signals5, despite the address being correctly set.
Solution:
- Check the power and DMX cable connections.
- Verify the DMX controller is set to the correct channel range.
- Use a DMX tester to ensure signal flow.
Best Practices for Address Code Setup
| Best Practice | Explanation |
|---|---|
| Pre-plan Fixture Layout6 | Group fixtures logically (e.g., front lights, back lights) to make address setup easier. |
| Use Address Ranges for Multi-Channel Fixtures7 | Assign address ranges like 001-004, 005-008 for multi-channel lights. |
| Test Fixtures Before Event8 | Always perform a dry run before an event to check fixture response. |
| Use Software for Large Setups | Software makes it easier to manage multiple fixtures and addresses. |
Conclusion
Setting the correct address code for your LED PAR lights is essential for smooth operation. Whether you’re using a control panel, DMX controller, or lighting software, following the right steps ensures your fixtures work independently. By following this guide, you’ll be able to set up your lighting system efficiently, avoiding common problems like address conflicts and incorrect channel allocations.
-
Understanding DMX-controlled setups is crucial for managing multiple lighting fixtures efficiently, ensuring seamless operation in events or performances. ↩
-
A unique address ensures each fixture operates independently, preventing conflicts and ensuring smooth performance in complex setups. ↩
-
Selecting the right lighting software can significantly enhance your ability to manage complex DMX setups, offering advanced features for fixture control. ↩
-
A DMX tester is essential for verifying signal flow and address settings, ensuring your lighting setup works flawlessly. ↩
-
Understanding DMX signal troubleshooting can save time and ensure your lighting fixtures perform as expected. ↩
-
Discover expert tips on organizing fixtures logically to streamline your address setup process, ensuring efficiency and accuracy. ↩
-
Learn how to effectively assign address ranges to multi-channel fixtures, enhancing your setup's organization and functionality. ↩
-
Understand the critical importance of testing fixtures beforehand to ensure a flawless performance during your event. ↩