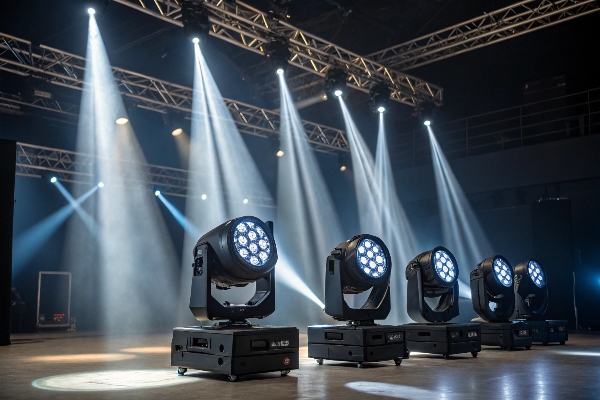
Are you struggling with setting the address code for your stage moving head lights? It might seem tricky, but once you understand the basics, it’s much easier than you think.
Setting the address code for stage moving head lights is essential for their correct operation in a DMX system. This guide will walk you through the entire process, step by step.
Understanding how to properly assign address codes to your stage moving head lights will ensure each fixture responds individually to the DMX controller. Let’s dive into the process of setting these addresses and avoiding common issues.
What is the Address Code for Stage Moving Head Lights?
You might be wondering, why is the address code so important for your stage moving head lights? Without a proper address, your lights won't respond correctly to the DMX system1.
The address code is a unique identifier for each fixture within the DMX network. It tells the controller which light to control and which channels to use for various functions like brightness, color, and movement.

The address code acts as the starting point for each DMX channel assigned to a fixture. When a controller sends a signal to a fixture, the address code tells it where to start. This system allows you to control multiple fixtures in a synchronized and organized way.
The Role of DMX Channels
| Fixture Channel | Purpose |
|---|---|
| Channel 1 | Controls brightness (dim or bright). |
| Channel 2 | Controls color (RGB, CYM, etc.). |
| Channel 3 | Controls movement (pan and tilt). |
| Channel 4 | Controls additional features (strobe, focus). |
By setting a unique address code2 for each fixture, you can control the movement, brightness, and other features independently. This helps create complex lighting setups where each light reacts to the controller’s commands.
How to Set the Address Code for Stage Moving Head Lights?
Setting the address code for stage moving head lights can be done in several ways: through the light’s control panel, using a DMX controller, or through lighting software3. Let’s go through each method.
1. Setting Address Code via Control Panel
Most stage moving head lights come with a built-in control panel, which allows you to manually set the address code. Here’s how to do it:
Step-by-Step Guide for Setting Address Code via Control Panel:
| Step | Action | Details |
|---|---|---|
| Step 1 | Power on the Fixture | Ensure the light is powered on and ready to be configured. |
| Step 2 | Access the Address Setting Mode | Navigate through the control panel to the “Address” option. |
| Step 3 | Set the Starting Address | Use the panel to enter the desired address code, for example, 001 for a 4-channel fixture. |
| Step 4 | Confirm the Address | Press the "Enter" or "Set" button to save the address. |
| Step 5 | Exit Setup Mode | Your fixture should now show the assigned address code on its display. |
Tips for Control Panel Setup:
- Ensure each fixture has a unique address to avoid overlap.
- If the fixture uses multiple channels, adjust the address accordingly (e.g., 001-004 for a 4-channel fixture).
- Make sure to confirm the address on the fixture’s display before exiting setup.
2. Setting Address Code via DMX Controller
For large setups with multiple moving head lights, using a DMX controller is more efficient. You can set the address codes for multiple fixtures at once using the controller. Here’s how to do it:
Step-by-Step Guide for Setting Address Code via DMX Controller:
| Step | Action | Details |
|---|---|---|
| Step 1 | Connect the Fixture to the DMX Controller | Plug the stage moving head light into the DMX controller using a DMX cable. |
| Step 2 | Access Address Settings on the Controller | Navigate to the “Address” settings on the DMX controller. |
| Step 3 | Assign the Starting Address | Select the fixture and set the starting address for that fixture (e.g., 001 for a 4-channel fixture). |
| Step 4 | Confirm the Address | The DMX controller will send the address code to the fixture, which will display it. |
| Step 5 | Test the Setup | Use the DMX controller to test the fixture's response to the address. |
Tips for DMX Controller Setup:
- Use a sequential address range4 for multiple fixtures (e.g., 001-004, 005-008).
- Always verify that no two fixtures share the same address code.
- Use the DMX controller5’s built-in testing function to ensure each fixture is responding correctly.
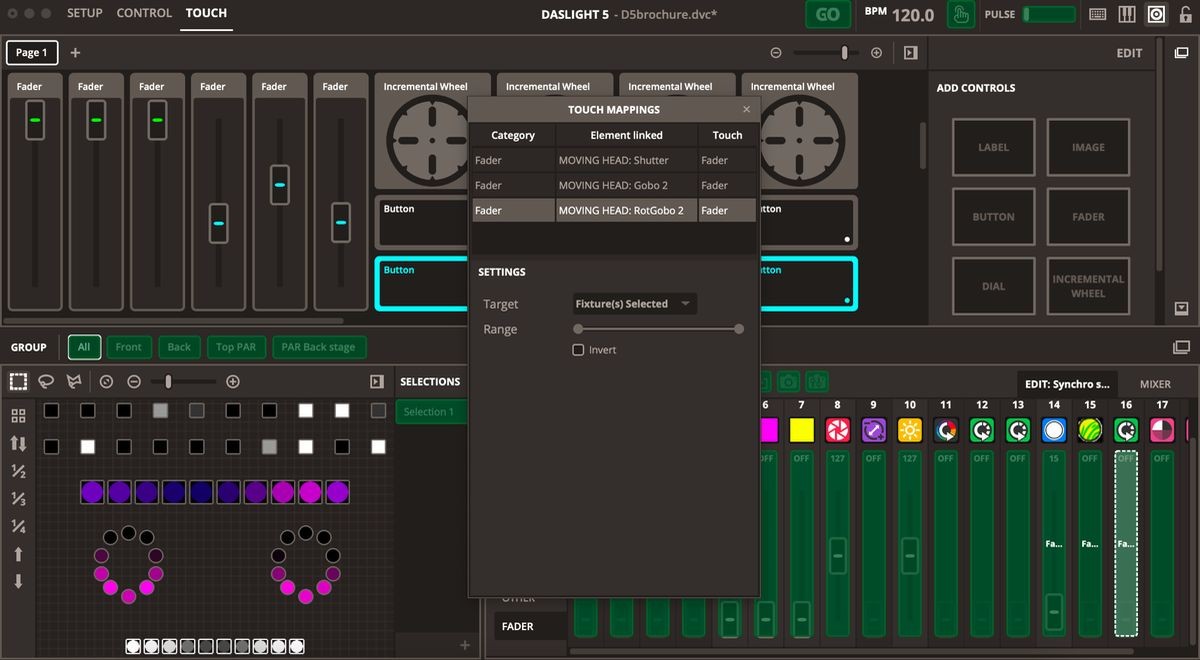
3. Setting Address Code via Lighting Software
For larger systems, lighting software can help streamline the process of setting address codes. It allows you to assign addresses to multiple fixtures at once. Here’s how to set the address via software:
Step-by-Step Guide for Setting Address Code via Lighting Software:
| Step | Action | Details |
|---|---|---|
| Step 1 | Connect Fixtures to Computer via DMX Interface | Use a DMX interface6 to link the computer with your stage moving head lights. |
| Step 2 | Open the Lighting Software | Open your preferred lighting software7 (e.g., Light Key, GrandMA, Chamsys). |
| Step 3 | Detect Fixtures | The software will automatically detect all connected fixtures. |
| Step 4 | Assign the Starting Address | Select each fixture in the software and set its address. |
| Step 5 | Confirm Settings | Verify that all addresses are correctly assigned and save the configuration. |
| Step 6 | Test the Setup | Run a test to confirm that each fixture is responding to the assigned address. |
Tips for Software Setup:
- Ensure the software is compatible with your fixture’s channel configuration.
- Always save your settings after assigning addresses.
- Run a complete system test before using the setup in a live environment.
Common Address Code Issues and Solutions
Even with careful setup, you might run into issues. Let’s look at the most common problems related to address codes and how to resolve them.
1. Address Code Conflicts
Problem: Two fixtures share the same address, causing them to respond identically to the same DMX signal.
Solution:
- Double-check the address codes on each fixture. Make sure no two fixtures share the same address.
- Use a DMX tester8 to verify the assigned addresses.
| Issue | Solution |
|---|---|
| Address Code Conflict | Ensure each fixture has a unique address code. |
| Incorrect Channel Allocation | Verify that the number of channels assigned matches the fixture's requirement. |
2. Fixtures Not Responding to DMX Commands
Problem: A fixture isn’t responding to commands despite the address being correctly set.
Solution:
- Check the power supply and DMX cable connections.
- Ensure the DMX controller is set to the correct address range.
- Test the signal using a DMX tester to confirm communication.
Best Practices for Setting Stage Moving Head Lights’ Address Code
Proper address code assignment can make or break your lighting setup. Here are some best practices to ensure everything works smoothly:
| Best Practice | Explanation |
|---|---|
| Ensure Unique Addresses for Each Fixture | Double-check that no two fixtures share the same address code. |
| Use Address Ranges for Multiple Fixtures9 | When using multi-channel fixtures, assign a range of addresses (e.g., 001-004, 005-008). |
| Test the Setup Before Events | Always run a test to ensure the system is set up correctly. |
| Utilize Lighting Software for Large Setups | Software makes it easier to manage and assign addresses quickly. |

Conclusion
Setting the address code for stage moving head lights is crucial for a seamless and professional lighting setup. Whether you are using a control panel, DMX controller, or lighting software, following the correct steps ensures each fixture operates independently. By adhering to best practices and addressing common issues, you’ll achieve a flawless lighting experience for any performance or event.
-
Understanding the DMX system is crucial for effectively controlling stage lighting, ensuring each fixture responds as intended. ↩
-
A unique address code ensures precise control over each lighting fixture, enabling complex and synchronized lighting setups. ↩
-
Discover top-rated lighting software solutions that offer intuitive interfaces and powerful features for managing complex stage lighting systems. ↩
-
Using a sequential address range simplifies the setup and management of multiple DMX fixtures, enhancing system reliability. ↩
-
Learn the efficient way to manage multiple moving head lights with a DMX controller, ensuring smooth operation and setup. ↩
-
Discover the essential features to look for in a DMX interface, crucial for reliable communication between your computer and lighting fixtures. ↩
-
Explore top lighting software to efficiently manage DMX fixtures, ensuring seamless setup and control for your lighting projects. ↩
-
A DMX tester is essential for verifying DMX signals and addresses, ensuring your lighting setup works flawlessly. ↩
-
Learning to use address ranges efficiently can save time and reduce errors in complex lighting setups, essential for professionals. ↩