Testing the lumen output of moving head lights might sound technical, but it’s essential to ensure your stage lights perform consistently. Without accurate testing, you risk dim spots and uneven lighting.
To test the lumen output of a moving head light, use a lux meter to measure the light intensity at a fixed distance. Apply the formula Lumen = Lux × Area for calculations.

Understanding the importance of lumen testing will help you maintain top-notch lighting for performances. This guide will walk you through every step, from tools to expert insights, ensuring accuracy and reliability.
What tools do you need to test lumen output?
Testing requires the right tools to ensure consistent results. Without them, you risk inaccurate measurements and poor performance evaluation.
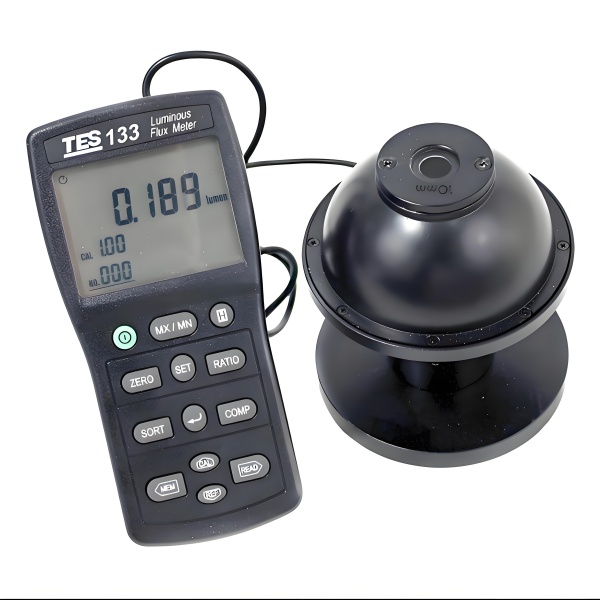
You’ll need a lux meter, a reflective surface1, a controlled testing area, and tools for distance measurement to test lumen output effectively.
Tools You Need and Why They Matter
Here’s a breakdown of essential tools and their purpose:
| Tool | Purpose |
|---|---|
| Lux Meter | Measures light intensity at specific points. |
| Testing Space | Ensures controlled conditions to eliminate interference. |
| Reflective Board | Helps evenly measure light output for consistent results. |
| Measuring Tape | Ensures accurate distance measurement for calculations. |
Setting up in a dark, interference-free space is crucial. Additionally, calibrate the lux meter2 before testing to ensure precise readings.
How do you test the lumen output of moving head lights?
The process of testing may seem intimidating, but it’s straightforward when broken into steps. Following a systematic approach ensures accuracy.
Start by setting up a controlled environment3, measure lux output at the beam’s center, and calculate lumens using Lumen = Lux × Area4.

A Step-by-Step Guide to Lumen Testing
Here’s a detailed walkthrough of the testing process:
-
Set Up the Testing Environment
Use a dark room free from ambient light. Position the moving head light at a fixed distance, commonly 2m or 5m, from the lux meter. -
Calibrate the Lux Meter
Before measuring, ensure the lux meter is properly calibrated and set to zero. -
Measure Lux Output
Turn on the light at full intensity. Aim the beam directly at the lux meter sensor and record the reading. -
Calculate Lumen Output
Use the formula:
Lumen = Lux × Area
Example: If your setup distance is 2 meters, the area is:
Area = π × (2 meters)² ≈ 12.57 square meters.
Multiply the measured lux value by this area to determine lumen output.
Why is lumen output not equal to actual brightness?
There’s often a gap between the lumen output and the actual brightness experienced on stage. This difference is due to various factors.
Lumen output is a theoretical value, but real-world brightness depends on the optical system5, beam angle6, and color of the light.
Dive Deeper: Factors Influencing Real-World Brightness
-
Optical System
The quality of lenses and coatings plays a major role in determining how effectively light is delivered. Higher-quality optics improve brightness. -
Beam Angle
Narrower beams focus light, increasing lux values. Wider beams distribute light, which can lower perceived intensity. -
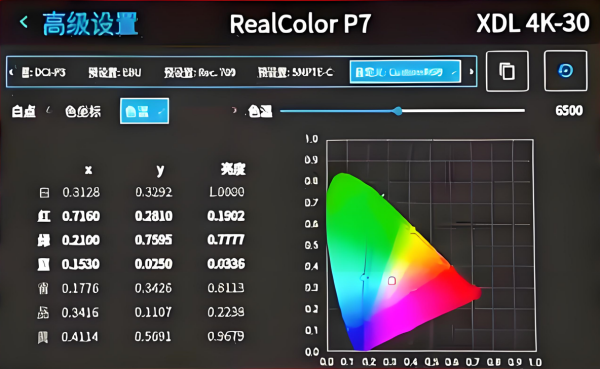
Light Color
White light typically has a higher lumen output. However, saturated colors like red or blue, especially in LED fixtures, often result in lower lumen values.
Pro Tip: When testing, record lux values in different color modes, especially for frequently used stage colors. This provides a more accurate understanding of performance.
Why do manufacturer claims differ from real-world results7?
Manufacturer specifications often look impressive but may not reflect actual performance under practical conditions. Here’s why.
Manufacturers often test under ideal conditions, but real-world results vary due to environmental factors and potential overstatements in marketing materials.

Dive Deeper: Reasons for Variance
-
Testing Environment
Manufacturers use labs with no reflections or absorbent materials. Real venues often have walls or objects that absorb light. -
Inflated Specifications
Some low-end manufacturers may list theoretical lumen values instead of actual tested results to make their products seem more powerful. -
Power Supply Stability
The quality of a fixture’s power supply affects light stability. A high-end power supply ensures consistent lumen output, while low-quality ones can lead to fluctuations.
Pro Tip: When purchasing, ask suppliers for detailed testing reports, such as IES files, to verify claims.
What advanced techniques can improve testing accuracy?
Basic lux testing works, but high-end professionals and manufacturers use advanced methods to measure lumens more accurately.
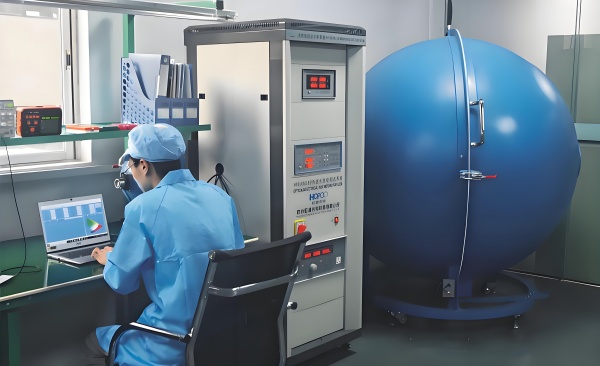
Professional-grade tests use integrating spheres8 to capture total light output and avoid common limitations of basic lux testing.

Dive Deeper: Advanced Testing Techniques
-
Integrating Sphere
This method captures light in all directions, ensuring total lumen measurement. While expensive, it’s the gold standard for accuracy. -
Simulating Advanced Techniques
For smaller budgets, measure lux at multiple angles around the light to approximate total output. -
Enhanced Formula
Use a corrected formula:
Lumen = Lux × Area × Beam Efficiency × Light Decay Factor
Beam efficiency is typically 75%-90%, while light decay accounts for aging fixtures. These values can often be obtained from manufacturers.
How does lumen testing improve performance and avoid pitfalls?
Testing not only ensures consistency but also uncovers potential issues, such as underperforming lights or overhyped products. It helps you make smarter decisions.
Lumen testing helps optimize placement, reduce energy costs, and avoid low-quality products that exaggerate brightness.
Dive Deeper: Benefits and Pitfalls to Watch
-
Improved Light Placement
Use high-lumen fixtures for key areas, while reserving lower-output ones for accent lighting. -
Energy Efficiency
Higher lumen fixtures often consume more energy. Testing helps balance brightness with power consumption. -
Avoiding Low-Quality Fixtures
Don’t be fooled by high lumen claims. Always check beam uniformity9 and lifetime data. For instance, reputable brands like Philips or OSRAM provide reliable specs.
Conclusion
Accurate lumen testing ensures your moving head lights perform at their best. Use these steps and tips to optimize your lighting setup and elevate every performance.
-
Understand the role of a reflective surface in ensuring even light distribution and accurate lumen output measurements. ↩
-
Discover top-rated lux meters to ensure accurate and reliable light intensity measurements for your lumen testing needs. ↩
-
Setting up a controlled environment is essential for eliminating variables that could affect the accuracy of light measurements, ensuring reliable results. ↩
-
The formula 'Lumen = Lux × Area' is fundamental for converting lux measurements to lumen output, a key step in assessing the brightness of moving head lights. ↩
-
Understanding the role of the optical system can help you choose the right lighting equipment for optimal brightness on stage. ↩
-
Exploring the effect of beam angle on brightness can guide you in selecting the best lighting setup for your stage needs. ↩
-
Understanding the gap between manufacturer claims and real-world performance can help you make more informed purchasing decisions. ↩
-
Discover how integrating spheres provide the most accurate lumen measurements, essential for professionals and manufacturers seeking precision. ↩
-
Understand the significance of beam uniformity in evaluating the quality and performance of lighting fixtures, avoiding misleading high lumen claims. ↩